I like this method for many reasons:
- It looks cleaner
- The facing doesn't creep to the public view side.
- It doesn't need to be hand stitched in place.
- The layering gives the grain more strength. It doesn't stretch out of shape. The black batiste is still below the printed fabric.
- The bodice lining totally covers the shoulder seams and the side seams.
I eliminate this step from the guide sheet: (Vogue Nina Ricci 1244)
Note: The guide sheet illustration shows the underlining being attached to the fashion fabric. The two layers are treated as one. This method leaves the raw edges of the shoulder seams and side seams RAW. The edges are completely exposed. Under linings can be very tricky. Anytime two fabric layers are sandwiched together 'as one' they can show slight puffs or blisters if they shrink at a slightly different rate during laundering.

 I start my facing process by 'block fusing' interfacing to the wrong side of my fashion fabric. Then I place my pattern piece onto my fabric and cut out my facing. ( Yes, it already has interfacing fused to the fabric !)
To finish the raw edge of the facing I cut out 1 inch wide bias strips of my underlining or lining fabric. This is a HONG KONG seam finish.
 I cut out a separate bodice (front and back) in cotton batiste or cotton lawn. The black cotton is NOT attached to the fashion fabric as the guide sheet shows.
 I cut out a separate bodice (front and back) in cotton batiste or cotton lawn. The black cotton is NOT attached to the fashion fabric as the guide sheet shows.
Use a temporary spray adhesive. This should eliminate any forward ripple while stitching. I find pinning to be unsatisfactory. Stitch the facing to the black underling next to the Hong Kong seam finish.
I prefer this Hong Kong seam finish to be approximately 1/8 inch. I feel 1/4 inch is a little too wide.
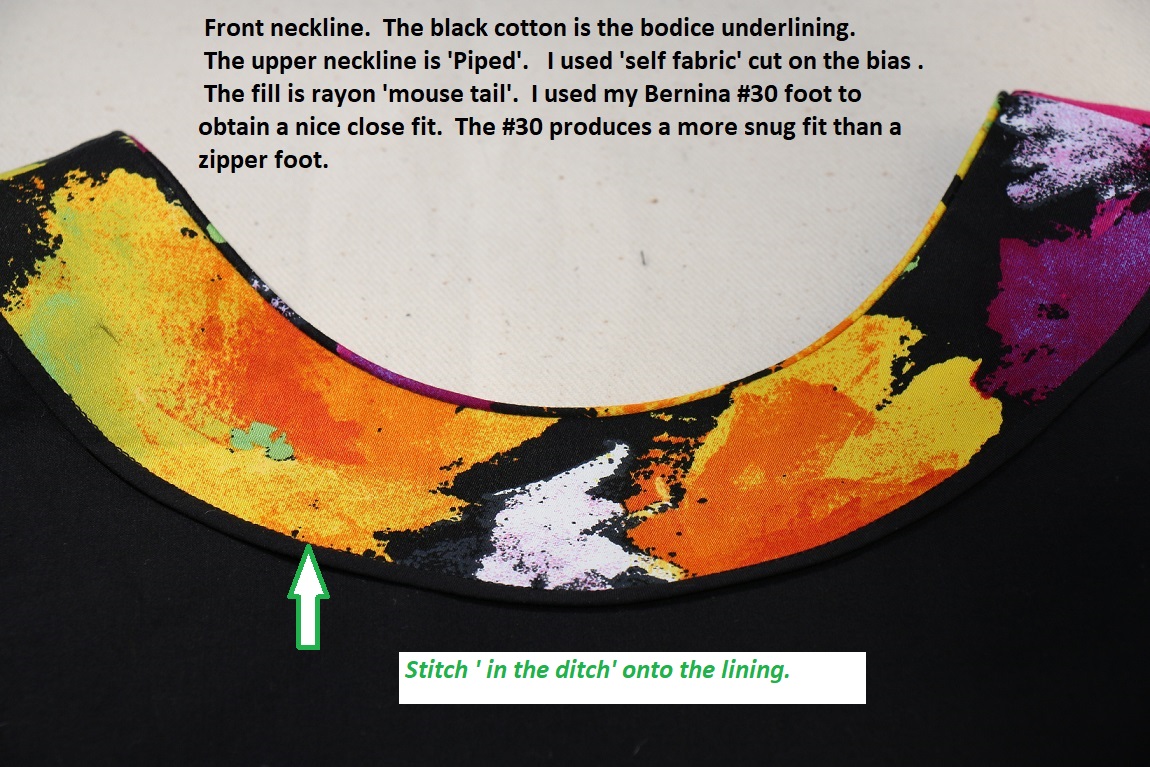
I placed my neck band facing directly on top of the cotton batiste lining. I 'stitch in the ditch' next to the Hong Kong seam finish. This eliminates all hand sewing!
Now the neck band facing and the underlining are considered ONE SINGLE UNIT. I added piping to the neck band edge. In the photo below you can see the facing is machine stitched to the black under lining. No hand sewing.


 The piping will prevent the diagonal back closure from stretching out of shape.
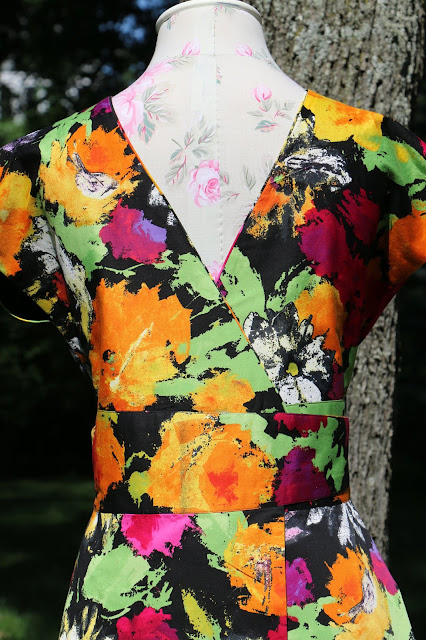

(The pink colored threads are my tailor tack tracings for the tucks.)

The guide sheet illustrates top stitching around the armhole. I wanted to eliminate this line of stitching. Also, I wanted to cover up the seam allowances.

The illustration above shows hand stitching the facing to the under lining to keep it secure.
The inside of the garment is completely finished. No raw seams anywhere.


No comments:
Post a Comment