The challenge is to 'tame the beast'. This may require testing a variety of threads, needles, and feet to see what will work with your fabric weight and your machine. The more sophisticated machines with dual feed, sensors and variable thread sensing tension systems may help. Keep in mind that all super lightweight fabrics and very thick fabrics will be more challenging than mid-weight fabrics.
Given the fact that rayon and synthetic fibers are more predominant it is important to be mindful of their properties when stitching or pressing with an iron. Their inherent sensitivity always makes me select a cotton knit if I can get my hands on some. Cotton is somewhat easier to work with. Many of the knits have (elastane) added which helps with resilience and body. There is such a thing as too much lycra (in my opinion) which causes the fabric to have no draping properties. Reminds me how my mother dried bath towels. She would let them dry on a wooden clothes dryer. When those towels were dry they could stand up in a corner by themselves to saying nothing about scratching your skin like using a sheet of sandpaper. We didn't own a clothes dryer when I grew up. Everyone hung their clothes outside or in the basement. (And she didn't use softener in the rinse cycle.) Now, can you visualize a fabric with too much body ???
 Cutting The Pattern: Use tons of pattern weights to hold the fabric and pattern in place so the pattern and fabric can't possibly drift on your cutting mat. The weights I use are from a marine supply house that my sewing buddy gave me for my birthday.
This will keep the layers from shifting while you are cutting the seam lines with a rotary blade. Using shears means the fabric is being lifted from the surface. Pinning the knit doesn't stop the fabric from drifting between pins especially if the fabric is sheer.


Fabric(s): The process I am suggesting in the steps below is for washable fabrics.
Pattern: Loose tank style dress.
Pattern: Loose tank style dress.
 Cutting The Pattern: Use tons of pattern weights to hold the fabric and pattern in place so the pattern and fabric can't possibly drift on your cutting mat. The weights I use are from a marine supply house that my sewing buddy gave me for my birthday.
This will keep the layers from shifting while you are cutting the seam lines with a rotary blade. Using shears means the fabric is being lifted from the surface. Pinning the knit doesn't stop the fabric from drifting between pins especially if the fabric is sheer.
Taming The Fabric: Use a solution of Terial Magic Stabilizer in a spray bottle to spray the seam allowance area. I use equal amounts of product to water. Do NOT use the concentrated strength. It will be harder than cardboard if you do. I spread each pattern piece on the shower curtain. I lightly spray a solution of Terial magic along the seam allowances. This stabilizer will 'lock' the stretch when the fabric has dried. While it may be safe to use an iron to speed up the drying process on cotton fabrics like quilting cottons I do NOT recommend it on rayon . Rayon is more 'heat sensitive.' It may possibly damage /melt the fibers if the heat setting is too hot. It's much safer to air dry. The edges will curl when they come in contact with the moisture. That's fine. They will press out flat after drying.


Sewing Option#1: Sewing knits on a serger is definitely faster and often eliminates many of the stretching issues. Differential feed also helps.
Sewing Option #2: Many people who do not own a serger can still obtain excellent results with their domestic sewing machine. The problem many people experience is with the two layering shifting forward and stretching as they are seaming. The two layers do not move evenly. The feed dogs of the sewing machine are working the lower layer. If you happen to own a sewing machine with the integrated dual feed function then you definitely want to engage this feature to activate the upper feed system.
Sewing Option #3: The Even Feed Quilting foot can be somewhat helpful as well.


Additional stabilizing step: Use strips of sheer fusible interfacing to stabilize the armholes and neckline and hemline. This extra step helps to prevent these areas from stretching out of shape.
 This is a SELF-LINED bodice. It's safer to use the same fabric because they will shrink at the same rate. Also, if the fabric peeks out to the public side it will not be noticeable.
Step One: Stitch the neckline twice. Place the second of stitching directly on top of the first line. ( A triple stitch function may cause the fabric to stretch because the machine is moving back and forth. So that's why I sew two separate lines.)
Sewing on a 1/4 inch wide strip of silk organza is another great technique if you do not want to use the fusible interfacing.
If your fabric is heat sensitive or bulky this is very effective.

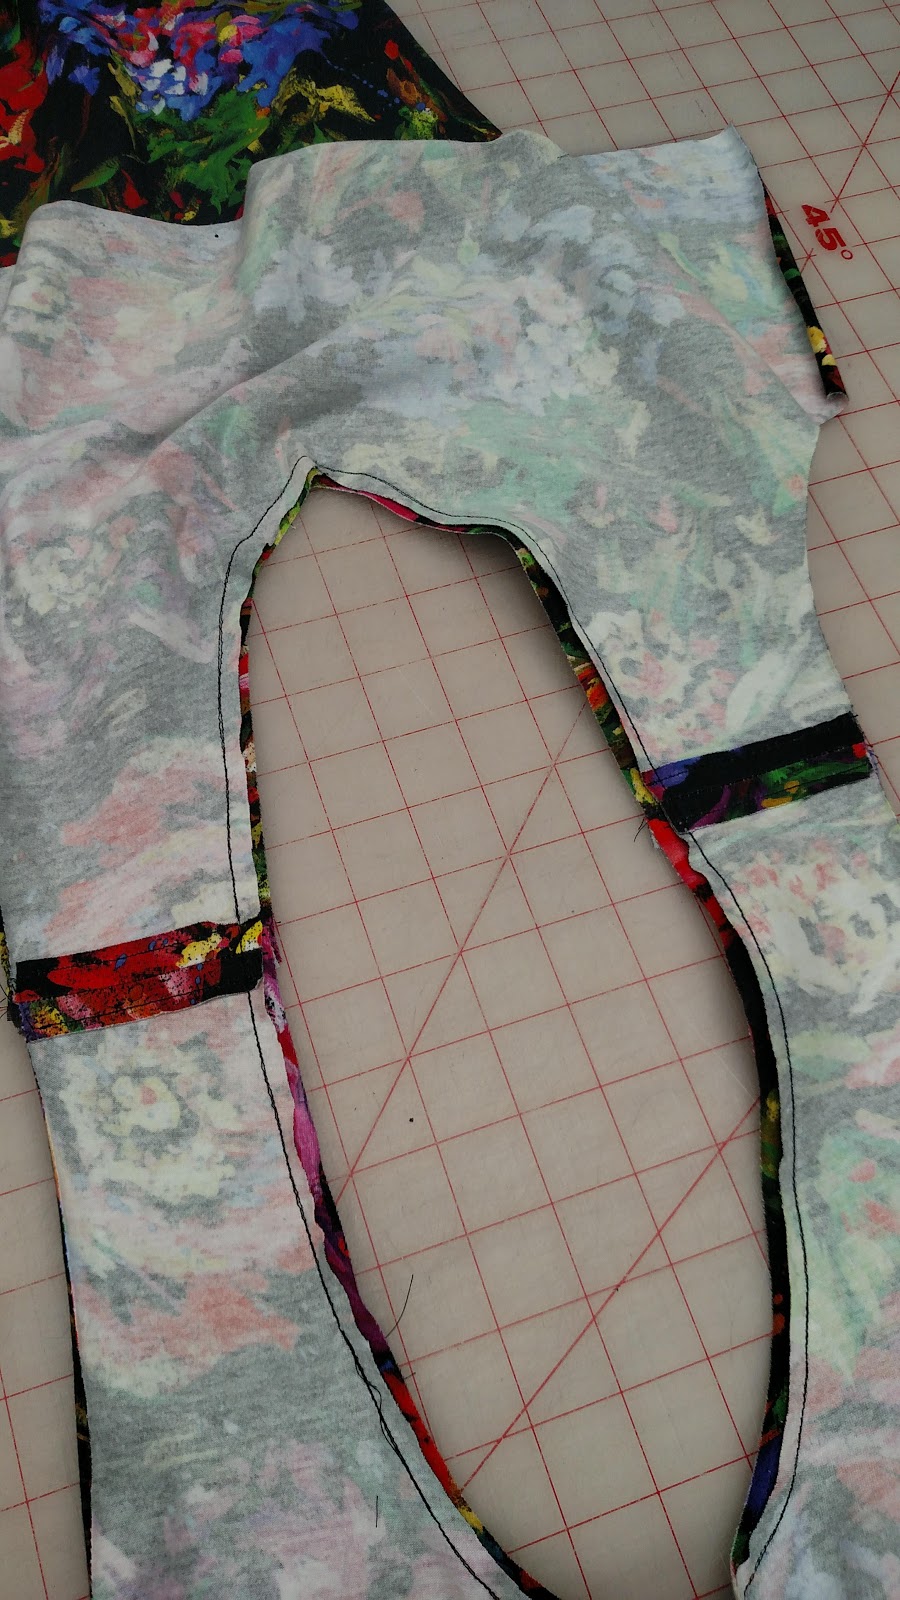
Step Two: This technique is known by many people as the Burrito Method.
Roll up the garment from the armhole toward the opposite arm hole. Stop when you are about two inches from opposite armhole. It will look like a long tube.
Bring one layer of the armhole over the tube. Notice how there is a bulge in the strap. One shoulder seam is rolled up inside the other shoulder seam. The line of pins are placed to keep the garment from travelling into the armhole waiting to be stitched.
Also, take note that the edges are uneven. The bodice self lining is showing 1/8th inch beyond the outside of the garment. I am purposely applying a 'favoring' to these edges. This will keep the bodice from peeking to the outside when the garment is turned inside out. Clip in the curved area like you would do for a woven to keep the seam from wanting to bend/curl.
Turning the garment inside out: You will actually pull the entire garment through the the shoulder seam.
 Hem Line: Stitch the HEM before the side seams. Fold the hemline up about ONE inch. Press. Hemlines less than one inch may curl to the public view. Hand baste near the raw edge. This will keep the two layers from forward rippling as you stitch cross-grain. This also serves as a guide line if you are using a COVER STITCH on a serger. I have also sewn a hemline with straight stitches on my domestic sewing machine using Guterman Maraflex Stretch Thread with a 3.5 stitch length. (I get this thread from WAWAK tailoring supply.) The reason I am using this method is to avoid sewing the hemline in a circle. While I do like that method this eliminate crossing over the side seams where many sergers will jam because the foot doesn't want to climb over the seam line. This often requires a 'hump jumper' or a few layers of fabric beneath the back of the foot to make the entire foot level. This alternative method works very nicely if you have issues with your serger doing the circular method. The only trick is getting the two layers even at the bottom. Basting cures that issue!
 Side Seams: Hand baste with a contrast thread the edges of the side seam allowances. This will prevent the edges from curling and from shifting as you serge the side seam. Make sure the hemline edges are even. Lock them together with a strong basting stitch.
Viewing the side seam at the hemline:
I press the seam to one side and secure with a few straight stitches to flatten the
seam line.

Viewing the wrong side of the garment you can see the underside of the cover stitch. Because I took the time to hand baste a guideline on the hem I was able to cover the raw edge more successfully.

Serger Seam:
First I baste my raw edges to keep them from curling. This will also keep the layers from shifting. I am using a two-needle serger side seam. Allow at least a 4 inch chain of stitches to run off the end of the seam at the hemline. DO NOT CUT THIS CHAIN of THREAD. Use a hand sewing needle with a large eye. Thread the needle hole with the chain stitches. Insert the chain into the seam allowance to hide.
